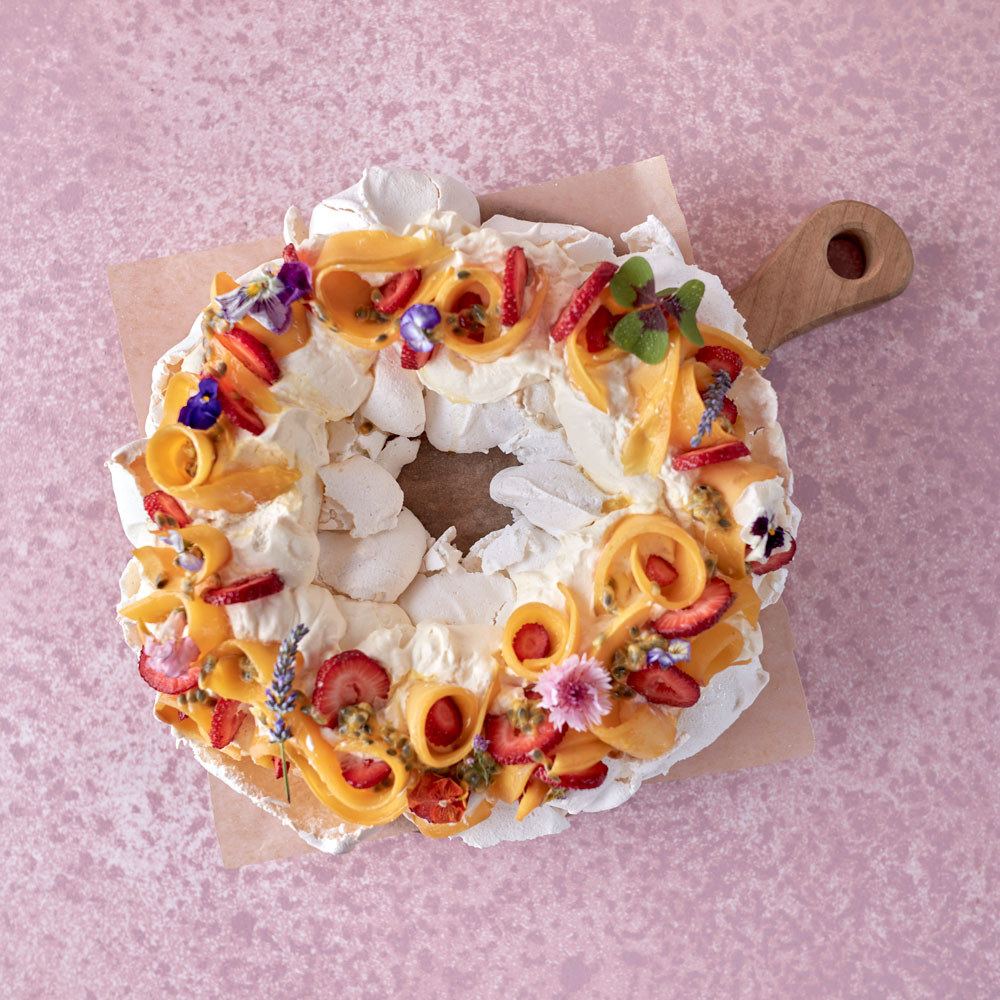
Pavlova Wreath
Serves 12
INGREDIENTS
8 egg whites (room temp)
2 cups caster sugar
2 teaspoons vanilla bean paste or extract
2 teaspoons fresh lemon juice
1 ½ tablespoons cornflour
pinch of salt
CREAM
600 ml thickened cream
1 ½ tablespoons caster sugar or icing sugar
1 teaspoon vanilla bean paste or extract
TOPPING
1 large mango (peeled, cheeks removed and thinly sliced)
1 punnet strawberries, sliced into round discs
3 passionfruit (add more or less based on your preference)
edible flowers
METHOD
Preheat oven to 150°C.
Pop a large round plate on a sheet of baking paper and trace around it. Place a smaller bowl inside that circle and trace around it to create a wreath shape. Flip the baking paper over and pop it on a baking tray. Now let’s get whisking!!
Place all eight egg whites into a bowl and whisk on the highest setting for 3 minutes, or until you start to get soft peaks. Add the sugar a dessert spoon at a time, making sure it’s dissolved in before adding the next spoonful. This process can take over ten minutes, so set a timer and be patient! (Remember to scrape down the sides occasionally) To make sure all the sugar has dissolved, rub a little meringue between your fingers. If it’s gritty keep whisking!! It needs to feel nice and smooth.
Now make a slurry by placing the cornflour, lemon juice, vanilla and salt into a small bowl and give it a mix. Add the slurry into the egg whites and give it a quick whisk until combined.
Grab the prepared baking tray and start to spoon on the meringue. Reduce the temperature to 120℃ and bake for 1hour and 20minutes. Once cooked, turn off the oven and leave it to completely cool in the oven with the door closed.
To whip the cream, add the ingredients into a bowl and whisk on high until the cream is nice and pillowy. When the pavlova is ready to assemble, transfer the meringue to a serving plate. Dollop big spoonfuls of cream on top and decorate with your favourite toppings.
*You can make the pavlova base up to 2 days in advance, and store it in an airtight container. Decorate prior to serving.
